
Showing posts with label sewing. Show all posts
Showing posts with label sewing. Show all posts
All grown up
So, I had my interview and was offered the job. I took the weekend to think it over and on Monday accepted the position. I am excited an nervous to start something new but I have a new wardrobe to look forward to creating. The position is corporate so no more swing dresses to the office for me, it's all suits in appropriate shades of bland. Luckily I have a large collection of 1960's women's suit patterns just jumping off my shelf waiting to be used. My first addition is from Advance #6802 and I spent yesterday altering the pattern as it is a size too large. Here is the muslin mockup. Today I start on the black wool suiting fabric then run off to Vidal Sassoon to offer my time as a hair model. Crossing my fingers on this one!

An Interview My Way
Unfortunately, or fortunately for me I was laid of of my job of four and a half years. Save your tears, it's better to get a life boat than to go down with the Titanic. Well, after one day of resume submissions I get a call in response to one and an interview is set up for Thursday the 10th. After spending half a second at Marshall's looking for an office appropriate suit I gave up and instead spent $35 on a few yards of wool suiting and pulled out one of my patterns from the 60's.


After two days of frantic sewing and creating my very first blazer I can only hope this will be my good luck charm to new employment.
After two days of frantic sewing and creating my very first blazer I can only hope this will be my good luck charm to new employment.
1940's Floral Swing Dress

Dress: Make by me, Pattern from Sense and Sensibility as a downloadable PDF
Shoes: Guess
Hair clip: Hot pink double flower from Bad Seeds
You may recognize this little number from my previous post, I also used this pattern to make a red version.


This was my first attempt at Sense and Sensibility's 1940's swing dress pattern and it took forever. Half of me wanted to burn the pattern and the other half wanted to struggle through. I can't say the instructions were terribly easy to understand in regards to the bodice/yolk portion. After staring at it on the dummy for weeks angrily I mustered up my google-fu and found some directions from other people who have completed the dress and voila, it all came together just in time for my once a year romantic holiday with my honey to Newport, RI where we attended a rousing polo match.

Robin's Egg Blue

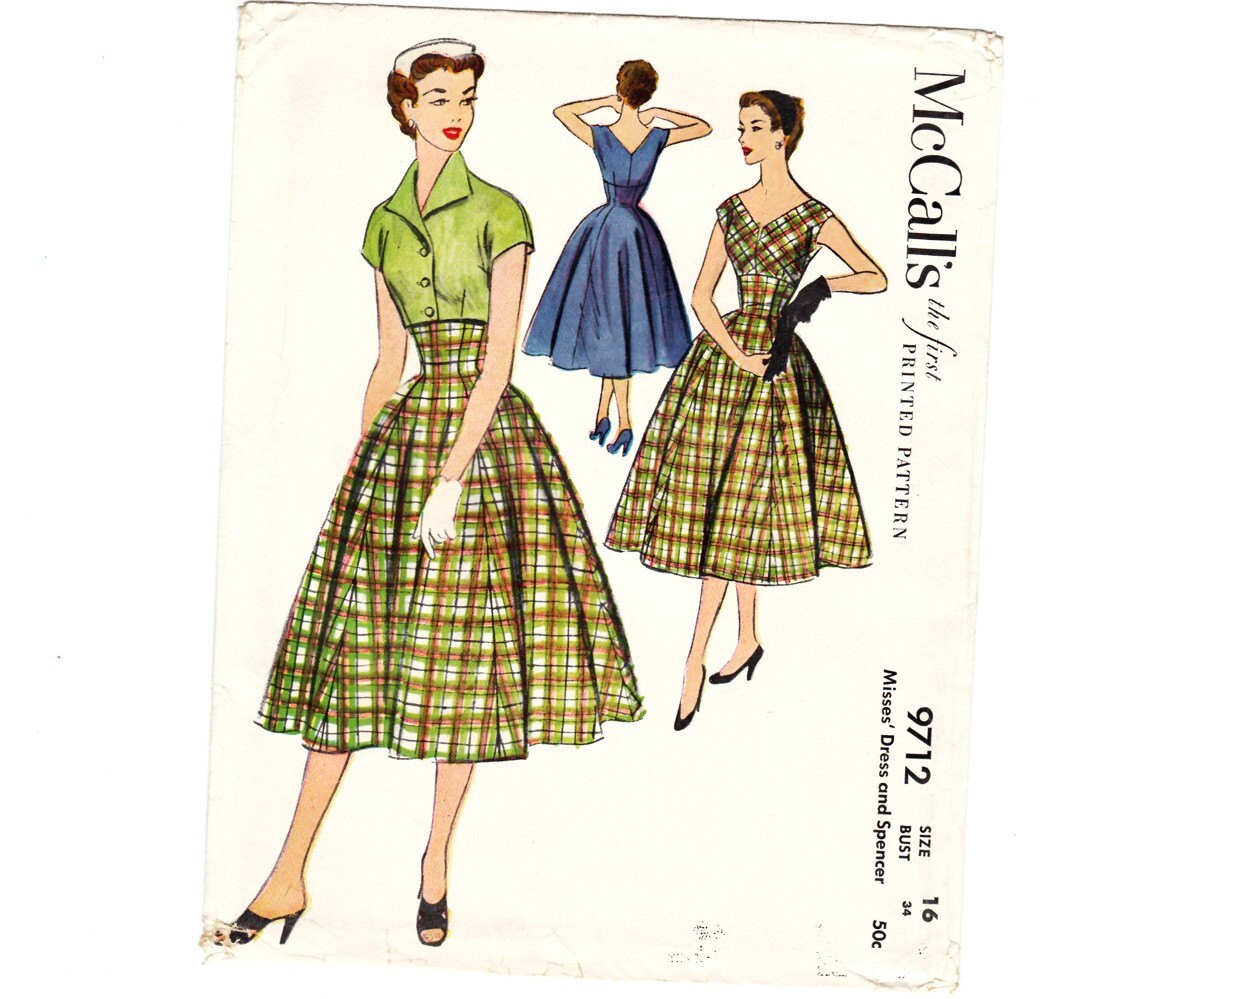
Dress: made by me, McCalls pattern #9712
Shoes: Nicole Miller, thrifted
Hair FLower: White Lily from Crafty Aple
Stepping into the 50s today for no real reason other than I wanted to wear these shoes.

There is something about polka dots that makes me go gaga. I flip every time I find a fabric with just the right colour combination of dots to background and this one just jumped into my arms. There is never enough robin's egg blue in a girls closet if you ask me. Anyway, I think I started sewing up this dress the day after I received the pattern (which was an Etsy purchase from My Sweetie Piepie's shop.) My special touch was the all silk lining I added to the skirt.

1938 Frock

Dress: Made by me, Pattern from Eva Dress
Shoes: Guess (DSW)
Necklace: My Grandmother's
Hair Clip: Made by me
Finally a warm sunny day in Boston and every spring like day deserves a floral dress. I lurved making this dress. The pattern was purchased from my favorite online shop Eva dress and the fabric was a random rayon find at the local fabric shop. I think I was so excited about this pattern I got the whole shebang completed in one day, and this is including surging on all exposed edges and the belt. I did try to update the pattern (okay, to the 40's) by not including the ruffling and sortening the hem closer to my knee line. 1930's dresses hit mid calf on me and as flattering as I think it is, it does make me look more matronly and I would rather look like i'm going dancing than to a nunnery.


Ahoy, matey!

It's a grey cold and wet day out, why not put on something nautical? Blouse is vintage, Skirt made by me using the skirt portion of an old 1930's dress design I have, and the shoes are thrifted.


Hepburn Slacks
The fabulous Katherine Hepburn was a fashion icon of her time. Her best fashion accessory, a long pair of slacks that went all the way up. No "whale tails" here girls.
Blouse is vintage and slacks were made by me about two years ago.


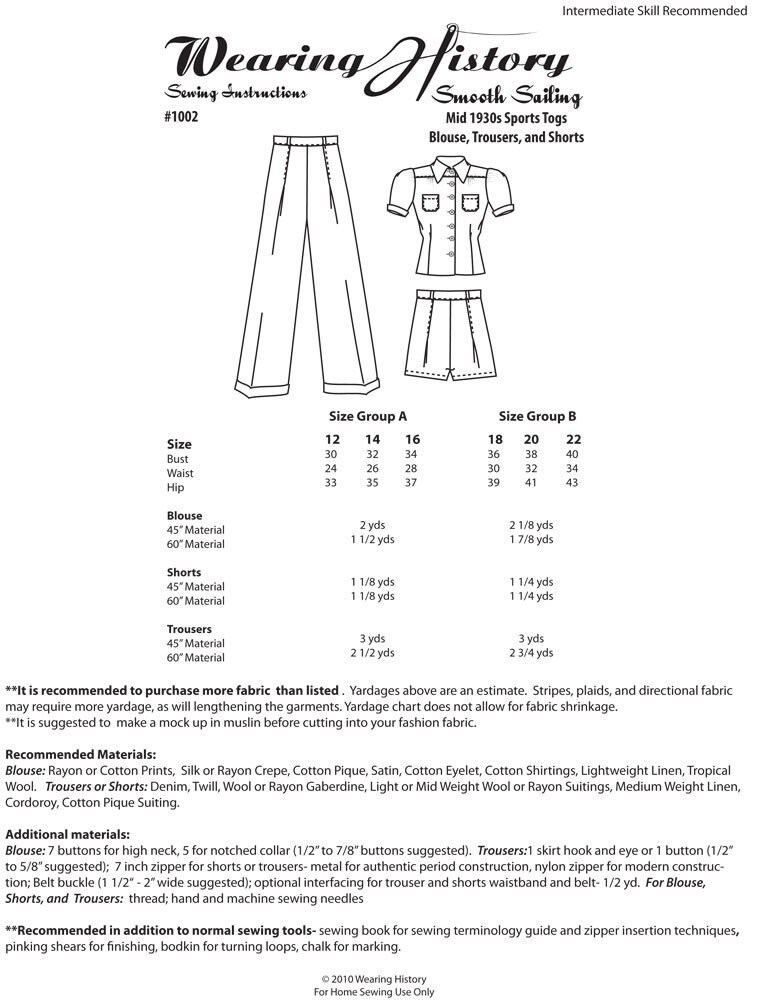
Pattern number 1002 from Wearing History

Blouse is vintage and slacks were made by me about two years ago.
Pattern number 1002 from Wearing History
Deconstruction: Day 1
Have you ever found the perfect vintage piece but the quality is absolute rubbish? If not, count yourself lucky, I was totally hoodwinked with this silk 1940s number. When I saw it in the shop the only issue I saw was a missing belt (typical of vintage dresses) and missing side snaps. No worries I've got a needle and thread and can put these back on, but honestly for the $90 price tag this should have been done already. I get the dress home and the snaps replaced and find that this has NEVER been dry cleaned as the arms smelled like a sweaty gorilla. $90, I'm just sayin'.

Anyway, I get it cleaned up and the silk just starts ripping and falling apart and there was no way to keep it together without additional damage occurring. What to do? Take that bad boy apart and create a new pattern, that's what.

So with my trusty seam ripper and some coffee I sit down to the delicate task of slowing taking the dress apart. I didn't get very far, I was able to separate the bodice from the skirt and have taken apart one of the two pockets. Tonight, I hope to take the entire skirt apart.

As each piece is removed, they will be labeled and marked with placement and general construction.
Anyway, I get it cleaned up and the silk just starts ripping and falling apart and there was no way to keep it together without additional damage occurring. What to do? Take that bad boy apart and create a new pattern, that's what.
So with my trusty seam ripper and some coffee I sit down to the delicate task of slowing taking the dress apart. I didn't get very far, I was able to separate the bodice from the skirt and have taken apart one of the two pockets. Tonight, I hope to take the entire skirt apart.
As each piece is removed, they will be labeled and marked with placement and general construction.
Pleats
The last day of our Boston March summer experience before the more seasonable weather arrives so I needed to take the tissue thin polka dot blouse out of the closet. Blouse from Red Dress Shoppe and pleated skirt, made by me!

My first time with pleats and I was frustrated and addicted, I had to make another in Navy.


I really doubled down on the polka dots today.

The pattern used for the skirt was Du Barry #5910. I need to make the matching blouse soon.
My first time with pleats and I was frustrated and addicted, I had to make another in Navy.
I really doubled down on the polka dots today.
The pattern used for the skirt was Du Barry #5910. I need to make the matching blouse soon.
The Sweetheart Dress
The weekend before the 1950's summer dress was the weekend of the 1940's "sweetheart dress. I placed a bid on this pattern through ebay for $7 and promptly forgot about it. I loath the bidding wars on ebay and generally stick with the "buy now" option. Imagine my surprise when I received an email of my win, I didn't even remember what I bid on.

The dress took me about 2 weeks to make. I must have been dragging my heals a bit because I am too impatient to allow myself to take that much time on a project. I really must create more sewing zen.
Figuring that Boston is experiencing a focused global warming event, I needed to get this little number off the hanger. Topped off with a fun and gigantic red pin-up flower purchased from Now Voyager on Etsy

I did alter the pattern slightly, I couldn't really stand the heart shaped pockets and created spade pockets with cuffs.

A simple tie in the back.

The original dress design as seen on the pattern envelope.
The dress took me about 2 weeks to make. I must have been dragging my heals a bit because I am too impatient to allow myself to take that much time on a project. I really must create more sewing zen.
Figuring that Boston is experiencing a focused global warming event, I needed to get this little number off the hanger. Topped off with a fun and gigantic red pin-up flower purchased from Now Voyager on Etsy
I did alter the pattern slightly, I couldn't really stand the heart shaped pockets and created spade pockets with cuffs.
A simple tie in the back.
The original dress design as seen on the pattern envelope.
Day 3: 1950's Summer Dress
Woke up hours before the BF and set to work trying to get my dress close to finished. I left off with a completed bodice and a lining to install. I chose a forest green, not because any is actually in the Madras plaid of my fabric but because I liked the subtle contrast. I got the liner bodice completed and sewn on to the top of the dress and then turned it into the inside of the dress.

The skirt portion was easy-peasy. 4 pieces, 4 darts and voila. This is where things get fun but tedious, installing the closure. The pattern called for either a placket closure or a slide. I hate to hand sew buttons and snaps to slide closure it was. The fun part is the type of slide closure. There was the ghetto way that I first used when starting out, this is the one where you they to install a zipper without a zipper foot or any education but done right, it's a Slash zipper. There is also the "invisible" zipper which I love as it is clean and simple to do. My chosen, was a side seam zipper, where the zipper is hidden beneath a small flap of fabric.

Start by ironing the fabric pieces open and flat. Taking the piece from the back of the dress, fold the fabric in half, pin and iron.


Take the zipper and pin it to the folded material and with your zipper foot attached, carefully run the needle as close as possible to the zipper teeth.


Open up the dress so that the zipper is layer across both halves of the dress. Now for the fun part. Run a needle and contrast thread along the side of the zipper not yet stitched to the dress, as close to the teeth as you can. This is to create a guide to run the zipper foot down. Turn the dress over and place into the machine and sew down the guide line. Remove the contrast thread, open the stitching to expose the zipper and admire your work.

I turned in the hem and ran out of the house to enjoy the weather before being able to complete the matching belt. This didn't deter me, I pulled out a black belt to use until I complete the belt and buckle and hit the town.

The skirt portion was easy-peasy. 4 pieces, 4 darts and voila. This is where things get fun but tedious, installing the closure. The pattern called for either a placket closure or a slide. I hate to hand sew buttons and snaps to slide closure it was. The fun part is the type of slide closure. There was the ghetto way that I first used when starting out, this is the one where you they to install a zipper without a zipper foot or any education but done right, it's a Slash zipper. There is also the "invisible" zipper which I love as it is clean and simple to do. My chosen, was a side seam zipper, where the zipper is hidden beneath a small flap of fabric.
Start by ironing the fabric pieces open and flat. Taking the piece from the back of the dress, fold the fabric in half, pin and iron.
Take the zipper and pin it to the folded material and with your zipper foot attached, carefully run the needle as close as possible to the zipper teeth.
Open up the dress so that the zipper is layer across both halves of the dress. Now for the fun part. Run a needle and contrast thread along the side of the zipper not yet stitched to the dress, as close to the teeth as you can. This is to create a guide to run the zipper foot down. Turn the dress over and place into the machine and sew down the guide line. Remove the contrast thread, open the stitching to expose the zipper and admire your work.
I turned in the hem and ran out of the house to enjoy the weather before being able to complete the matching belt. This didn't deter me, I pulled out a black belt to use until I complete the belt and buckle and hit the town.
Day 2: 1950s Summer Dress
So Saturday was productive but was also stopped by the obligatory trip to the bar for St. Patty's day.
I am not a muslin girl, I have yet to require a vintage pattern be created on muslin before being created on the chosen fabric. A modern pattern I do, my measurements are luckily spot on for the 20s-50s, it's the 21st century that I don't measure up to. So once I got the pattern pinned and cut, I used a transfer paper to mark any darts or required folds from the pattern to the fabric.

Then the fun started. I easily whipped up the bodice and then set to work cutting out the lining which I will have fold into the the upper portion of the dress only. This will be to protect my possibly summer sweaty body from creating unwanted folds in the folds in the dress.

I tried on the bodice before sewing the pieces of the lining together so that I could duplicate any adjustments needed on the fabric portion to the lining. I was able to finish this by the time we needed to head out.

Next, Lining and skirt.
I am not a muslin girl, I have yet to require a vintage pattern be created on muslin before being created on the chosen fabric. A modern pattern I do, my measurements are luckily spot on for the 20s-50s, it's the 21st century that I don't measure up to. So once I got the pattern pinned and cut, I used a transfer paper to mark any darts or required folds from the pattern to the fabric.
Then the fun started. I easily whipped up the bodice and then set to work cutting out the lining which I will have fold into the the upper portion of the dress only. This will be to protect my possibly summer sweaty body from creating unwanted folds in the folds in the dress.
I tried on the bodice before sewing the pieces of the lining together so that I could duplicate any adjustments needed on the fabric portion to the lining. I was able to finish this by the time we needed to head out.
Next, Lining and skirt.
1950s Summer Dress
Next project (after not posting anything for a year.) With the unseasonable warm up in Boston I really need to get a start on building up my weather appropriate wardrobe. After a couple winter pieces in January and February I need to change gears so here is the first installment of my 1950's summer dress.
It's a beautiful dress and bolero from Advance pattern no. 4904. When picking a pattern nothing is more important than the fabric and as luck would have it, I have a whole bolt of plaid cotton from the 50's!

So I don't destroy my delicate patterns I start by tracing them and making measurement adjustments from there. I am tall and not many women in the 49's and 50's were 5'9" and this is evident by every waistline being a good inch and a half above my belly button so copying the pattern and adding an inch to the new pattern is perfect for me.

It's a beautiful dress and bolero from Advance pattern no. 4904. When picking a pattern nothing is more important than the fabric and as luck would have it, I have a whole bolt of plaid cotton from the 50's!
So I don't destroy my delicate patterns I start by tracing them and making measurement adjustments from there. I am tall and not many women in the 49's and 50's were 5'9" and this is evident by every waistline being a good inch and a half above my belly button so copying the pattern and adding an inch to the new pattern is perfect for me.
1932 Street Frock

Crossing my fingers on this!


Subscribe to:
Posts (Atom)