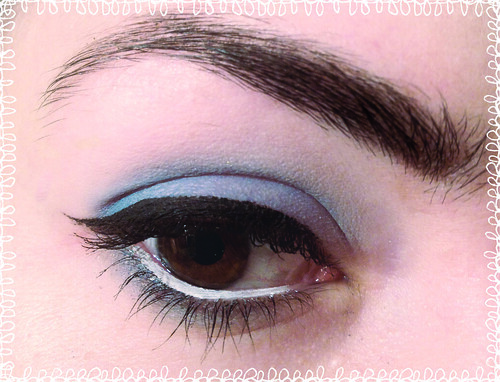
I love dressing up my eyes, and my favorite fun wearable style is the nautical pin-up. It compliments victory rolls and swing dresses and can also be worn with jeans *wink*.
I like to do my "nautical" eyes in a subtle way, so the bright blue catches attention without looking clownish. I have laid out step-by-step instructions after the page break to show how easy this look is.
Step One: Primer
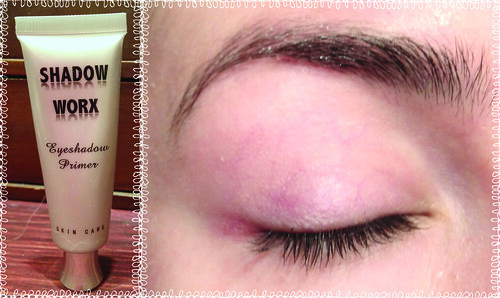
The blank canvas! This is where the magic happens, so to make sure your peepers last all day apply eye shadow primer to the entire lid.
Step 2: Base
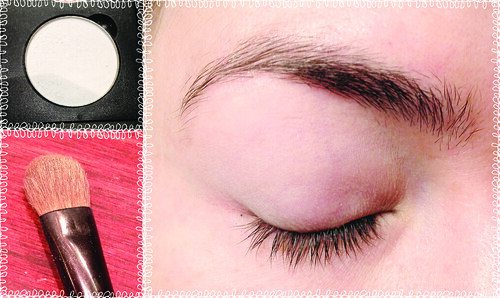
When your lid is primed use a white shadow and a large shadow brush and apply the shadow to the entire lid and up to the brow.
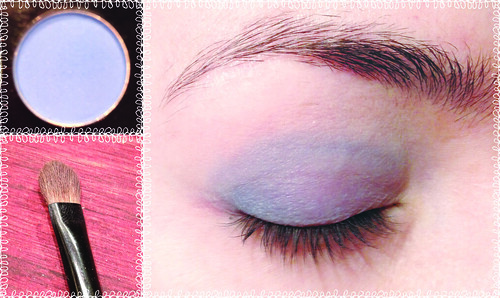
Step 3: Lid
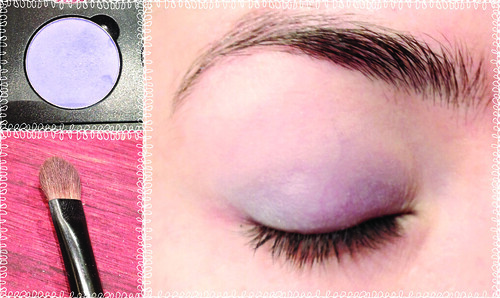
Using a soft cornflower or periwinkle blue, use a medium shadow brush to apply the shade to the entire lid.
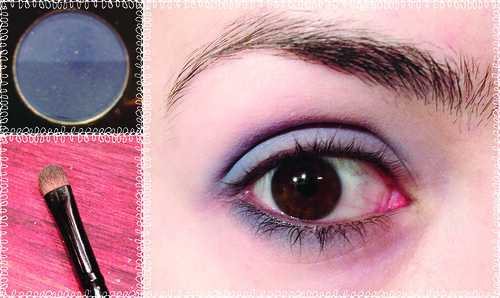
Step 4: Depth
Using an ocean/sky blue (two shades darker than the lid colour) use a medium/blending brush to apply the colour to the outer corner and into the crease of the lid.
Step 5: Crease

With the same brush, apply a dark blue to the crease only, starting in the outer corner and tapering the application of colour towards the inner corner.
Step 6: Lower Lid
With a definition brush, use the same dark blue and apply it to the lower lid. don't apply the colour to the entire lower lid, the center of the eye is a good place to taper the colour.
Step 7: Liner and "Wing"
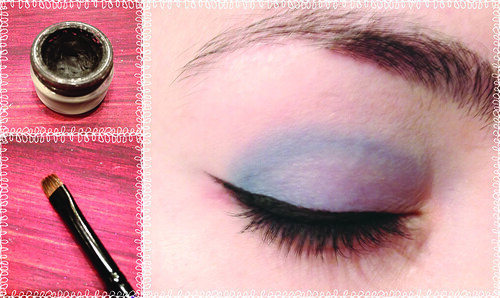
Some may not be as familiar with creating a "wing" with the eye liner but it really is quite simple. I recommend using a gel or liquid liner. It goes on smooth and you have more control of the line definition.
Dip the lining brush into the gel and drag it or lightly draw short lines from the out corner to the inner corner. A vintage eye is made all the more authentic if the liner goes right to the inner corner and a thin brush is best for that.
When the eye liner is applied to your liking on the upper lid, dip the brush in the gel again and place the angled edge at the far corner and "flick" it out. This flicking will create a nice crisp point at the end of the wing. Fill in the space to create a little arrow and there you have it. YouTube is a great place for extra tips and visuals.
Step 8: Tight Line
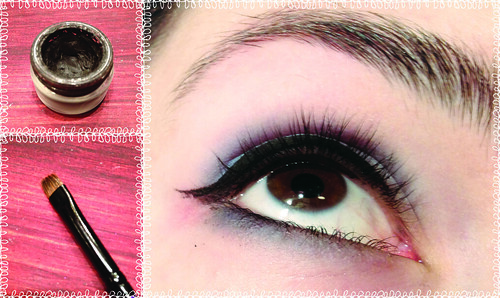
Holy crackers this tickles! I sorta pull the lid up softly with my finger to expose this area and just draw short lines till I'm satisfied with the coverage.
You can skip this step if you are not comfortable with applying liner to the inner portion of your lid but once you get more skilled you may enjoy this added umph to the lid.
Step 9: Water Line
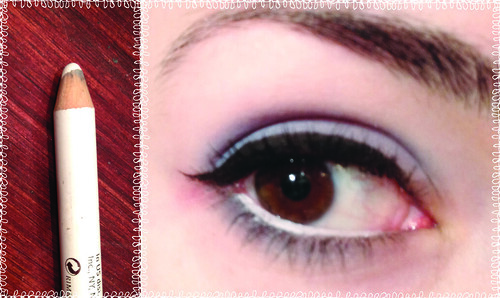
I love this step. Adding white liner to the water line not only makes your eyes pop, it gives them a wider appearance. Use either a waterproof gel or waterproof liner and stay away from shimmery shades as they won't show up as well. I am not as forgiving with skipping this step, it is a must for this look.
Step 10: Brow and Lashes
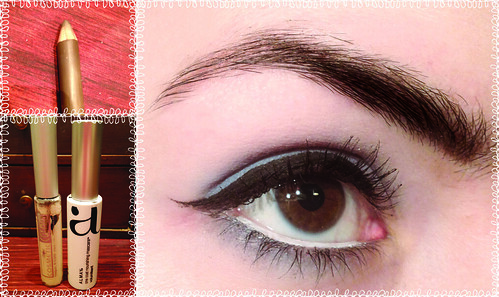
To pull the whole thing together we want a well defined brow and thick dark lashes.
Taking a brow pencil in a shade suitable to your hair colour, pencil in an arch and deepen the thickness of the inner portion of the brow.
Last are the lashes, I prefer to apply a lash primer first and then cake on a super black mascara. If you have a special occasion top the lashes with falsies.
Well there you have it, a Nautical pin-up eye. I hope you found it easy, fun and informative.
No comments:
Post a Comment